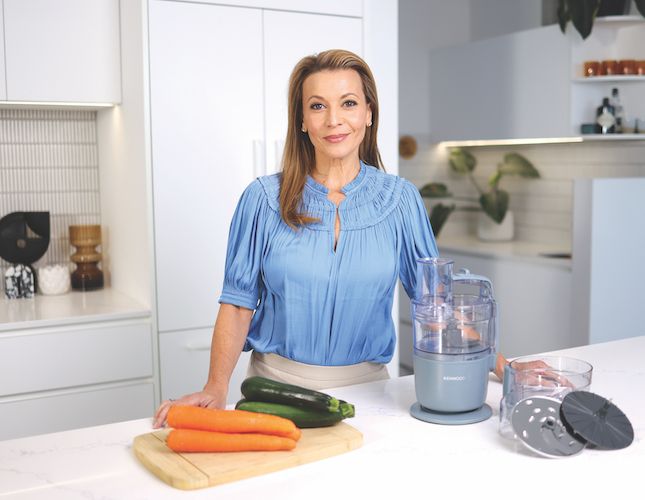
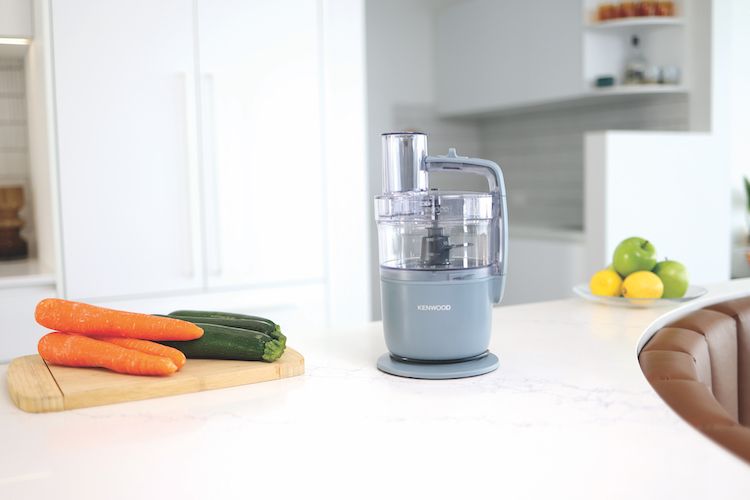
How To: Save Time, Effort & Space with Kenwood’s MultiPro Go
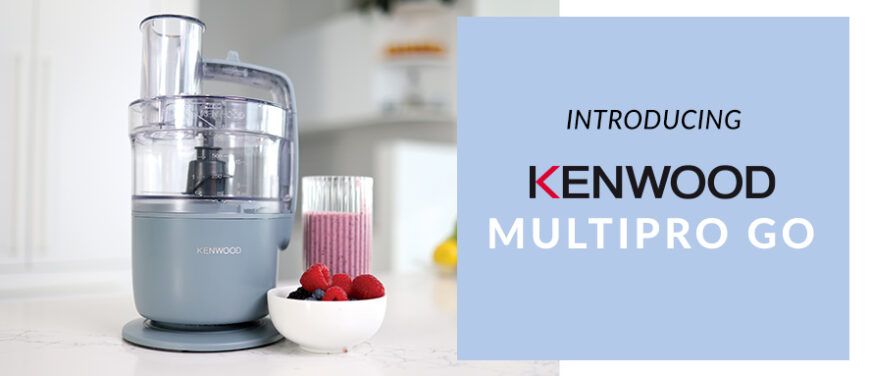
Swiftly prepare ingredients and create the dish of your desires with Kenwood’s new MultiPro Go Food Processor. When you’re trying to get dinner on the table or feel like baking a sweet treat, of course the faster the better, and with the MultiPro Go Food Processor, you can forget minutes wasted chopping, slicing or kneading and enjoy faster food preparation.
Small Footprint
While other food processors are bulky in design and have attachments that are awkward to store, you’ll love that Kenwood’s MultiPro Go Food Processor is anything but. Boasting a compact design with a petite motor base and a bowl that neatly fits all attachments, the MultiPro Go Food Processor is perfect if you need a clutter free processor. Only 30cm tall, the Kenwood MultiPro Go can be effortlessly stored under shelves, in drawers and cupboards.
Powerfully Petite
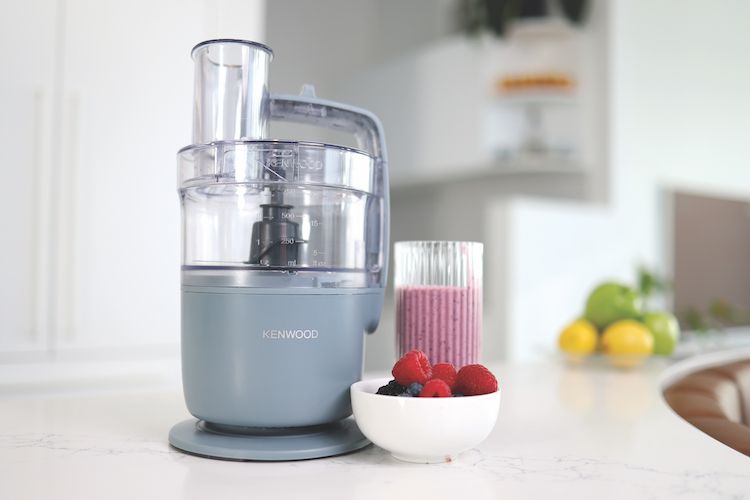
The old saying is “Don’t judge a book by its cover”. And the same applies for the ultra-compact and portable MultiPro Go Food Processor. With a 650W motor and two speed levels which includes a Pulse function, nothing is too much for Kenwood’s MultiPro Go Food Processor.
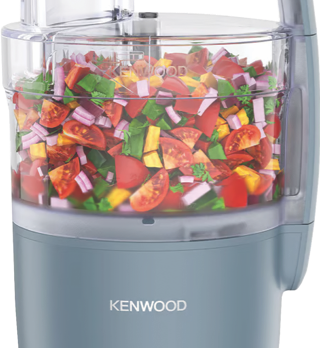
Meets Every Task
Chop, slice, grate and even knead, the Kenwood MultiPro Go Food Processor can do it all. Shorten prep time whether you’re making a slaw, blending a smoothie, creating a sauce or when kneading pizza dough.
Attachments for All
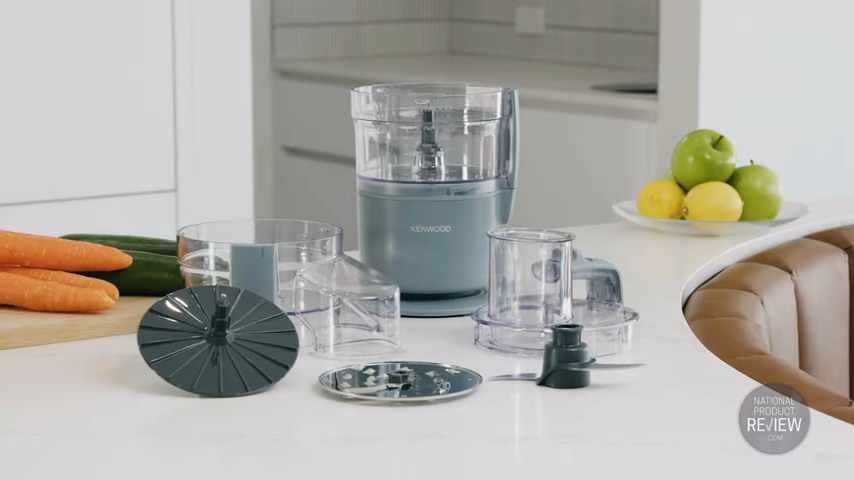
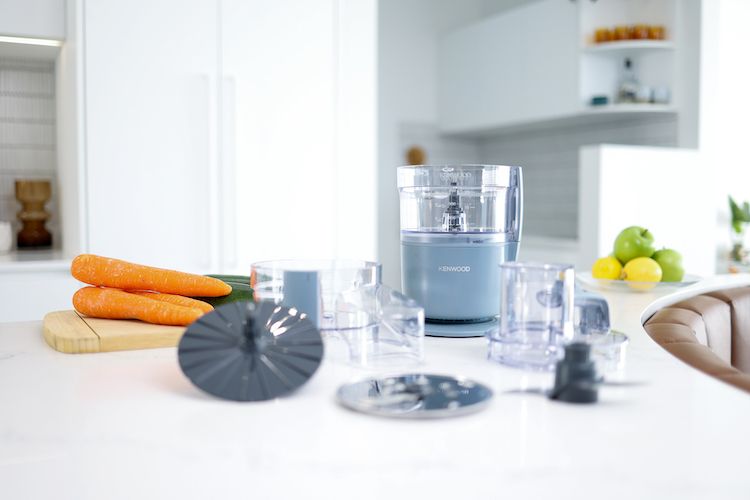
Regardless of the meal or time of day; breakfast, lunch, or dinner, master food prep with the Kenwood MultiPro Go Food Processor’s included attachments. The food processor includes a:
- 3L Chopping Bowl: nicely fits your ingredients
- Chopping Knife Blade: chops finely
- Reversible 4mm Slicing/Grating Disc: enables slicing and grating
- 360˚ Express Serve™: a Kenwood exclusive that lets you grate or slice into your serving bowl (more on this below)
Express Serve™ and Go
Professionally slice, grate and prepare food directly into your cooking device or bowl with the Kenwood exclusive 360˚ Express Serve™attachment. Say goodbye to limitations set by the chopping bowl’s capacity as your endlessly grate your vegetables or slice your fruits into the cooking vessel or dish of your choice. Grate zucchini into a stir fry or slice pears into your fruit salad? The options are all yours.

Dishwasher Safe Parts
Fuss-free cleaning and maintenance is just another reason to love the Kenwood MultiPro Go Food Processor. All removable parts including the 1.3L bowl, blades and chopping attachments are fully washable, and they’re also dishwasher safe, so you can just add them to your washing load.
Nesting Storage
Chaotic storage on your bench or cupboards will be a thing of the past with the nesting storage of the Kenwood MultiPro Go Food Processor. All attachments can be stacked on top of one another within the food processor’s bowl so that everything is in one place, great for small areas, as well as removing the chance for any parts to go missing!
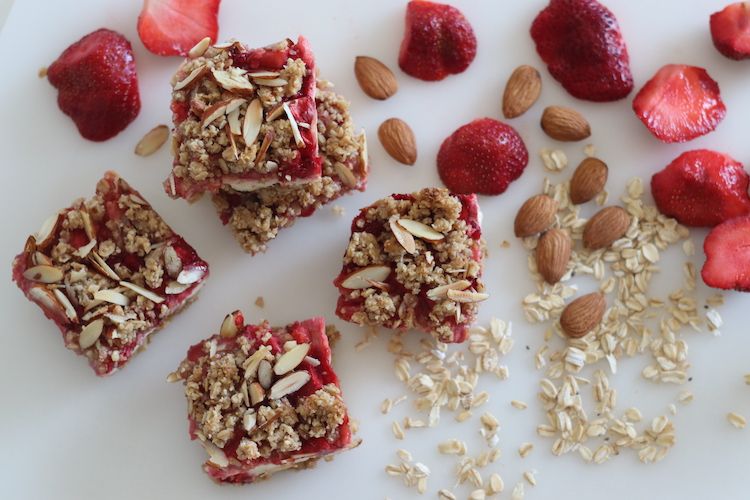
Recipes to try with the MultiPro Go Food Processor
Healthy Berry and Coconut No-Bake Bar
Serves 4
Makes 8
Difficulty: Low
Time: 80 minutes
Ingredients:
For the bars
- 125g mixed berries
- 220g desiccated coconut
- 85g coconut oil
- Pinch of salt
- 250g dark chocolate
To serve
- Mint leaves
- Strawberries
- Raspberries
- Blueberries
Method:
- Line the square tin with parchment paper. Assemble the food processor bowl onto the power unit. Fit the Knife Blade to the food processor bowl.
- Add the mix berries into the food processor bowl. (Tip: If you are using frozen mixed berries, defrost them first). Attach the lid and ensure the pusher is in the feed tube. Mix until pureed.
- Add the desiccated coconut, coconut oil and salt into the food processor bowl. Mix until combined. Press the mixture into the prepared square tin with a spatula or your hands until level. Chill in the freezer for 30 minutes or until firm.
- Add the dark chocolate into a heatproof bowl. Heat in a microwave until melted, stirring occasionally to prevent burning. Alternatively, place the heatproof bowl over a saucepan of simmering water and stir occasionally until melted. Set aside and let cool slightly until thickened.
- Place a cooling rack over a large baking tray. Remove the coconut mixture from the freezer. Invert the square tin onto a chopping board, remove the parchment paper. Using a sharp knife, cut into 8 equal rectangles and trim the edges if needed. Transfer the bars onto the cooling rack. Pour the melted chocolate over the bars until coated. Refrigerate for 30 min – 1 hour until set.
Serve
Serve with mint leaves, strawberries, raspberries and blueberries.
Substitutions
Mixed berries can be replaced with defrosted frozen mixed berries. Coconut oil can be replaced with coconut butter.
The bars can be stored in an airtight container in the fridge for one week or in the freezer for 2 months.
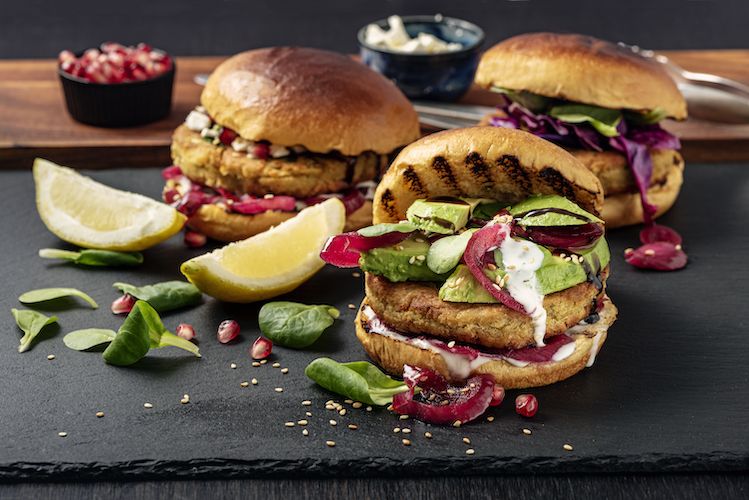
Cheesy Chickpea Burgers
Serves 8
Time: 30 minutes
Ingredients:
For the burgers
- 500g dried chickpeas, soaked overnight and drained
- 1 onion, roughly chopped
- 4 cloves garlic, roughly chopped
- 2 red chilli, roughly chopped
- ½ tsp ground turmeric
- 2 tsp smoked paprika
- 1 small bunch coriander
- 2 eggs
- 2 tbsp Dijon mustard
- 2 tbsp tamari sauce
- 1 tsp salt
- 1 tsp ground black pepper
- 2 tbsp toasted sesame oil
- 1 tbsp vegetable oil
To serve
- 8 slices firm mozzarella
- 8 brioche buns, split and toasted
- 4 tbsp mayonnaise
- 2 tbsp sriracha sauce
- Lettuce, leaves separated
- 2 tomatoes, sliced
Method:
- Preheat your oven to 200°
- Add half of the soaked and drained chickpeas to the bowl of your MultiPro food processor, fitted with the knife blade and process until they are chopped coarsely. Tip into a large bowl and reserve.
- Add the rest of the chickpeas, and all of the other burger ingredients, except the vegetable oil, into the bowl of the processor, and process until the mixture is a soft paste. Tip this into the bowl with the chopped chickpeas and stir together. Form the mixture into 8 equally sized patties using your generously vegetable oiled hands and place onto a parchment lined baking sheet.
- Bake the burgers in the preheated oven for 10 minutes, then turn them over and bake for another 5 minutes. Add a slice of mozzarella to the top of each burger, and return to the oven for 3 more minutes, to allow the cheese to melt.
- Whilst the burgers are baking, mix together the mayonnaise and sriracha, and spread over one side of each of the toasted buns. When the patties are ready, remove them from the oven and build the burgers, each with a slice of tomato and a leaf of lettuce. Serve!